Table of Contents
Categories
Types of Bearing Inspection Methods: Comparative Analysis and Applications
Introduction
Importance of bearing inspection
Bearing inspection holds paramount significance in ensuring the reliability, safety, and efficiency of machinery across various industries. Bearings serve as vital components in countless mechanical systems, facilitating smooth rotation and movement. Over time, bearings are subjected to wear, stress, and environmental factors that can compromise their integrity, leading to unexpected failures and costly downtime. Through systematic inspection, potential issues such as wear, damage, or misalignment can be identified early, allowing for proactive maintenance interventions. This proactive approach not only minimizes the risk of unplanned breakdowns but also extends the lifespan of machinery, optimizing operational performance and reducing overall maintenance costs in the long run.
Overview of bearing inspection methods
Bearing inspection methods are crucial for ensuring the reliability and performance of machinery across various industries. These methods encompass a range of techniques aimed at assessing the condition of bearings, identifying potential issues, and determining maintenance needs. Visual inspection serves as a fundamental starting point, allowing inspectors to detect obvious signs of damage such as corrosion, wear, or contamination. Additionally, tactile inspection involves physically feeling for abnormalities like roughness or unevenness on the bearing surfaces. Advanced techniques such as vibration analysis and thermography provide deeper insights into the internal condition of bearings, enabling predictive maintenance strategies to prevent costly breakdowns and enhance operational efficiency.
Purpose of comparative analysis
By comparing various inspection methods, including visual inspection, dimensional measurement, non-destructive testing (NDT), and condition monitoring techniques, engineers and maintenance professionals can make informed decisions about the most effective approach to assess bearing health. Comparative analysis enables the identification of the most appropriate method based on factors such as accuracy, speed, cost-effectiveness, and detectability of defects. This systematic comparison aids in optimizing inspection processes, maximizing resource utilization, and minimizing downtime by selecting the most efficient and reliable inspection method tailored to the unique requirements of each situation.
Visual Inspection
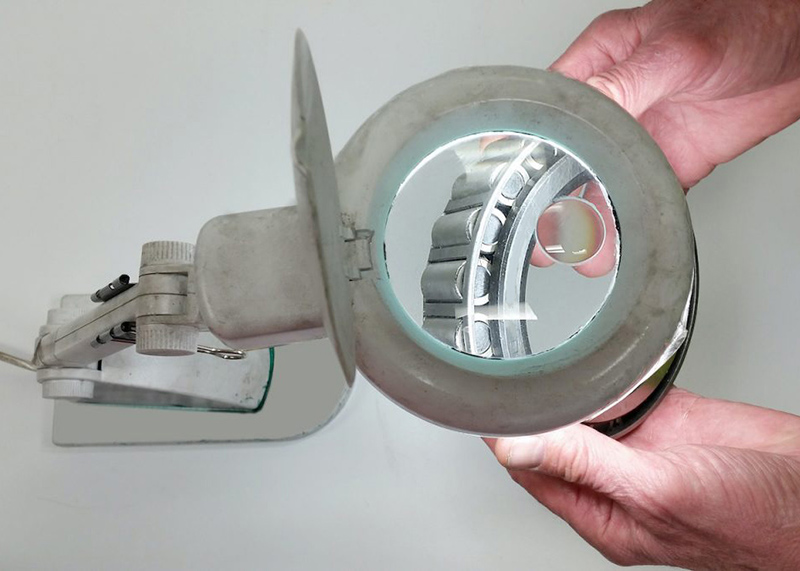
Visual inspection, the most basic and fundamental method in bearing assessment, involves the visual examination of bearing surfaces and components for signs of damage, wear, or irregularities. This method serves as the initial step in identifying potential issues that may affect bearing performance and reliability. During visual inspection, technicians carefully examine the outer surfaces of the bearing, including the raceways, rolling elements, cages, and seals, using appropriate lighting and magnification tools if necessary.
Common defects that can be detected through visual inspection include cracks, spalling, pitting, corrosion, and abnormal wear patterns. By observing these visible indications, technicians can assess the overall condition of the bearing and determine whether further inspection or maintenance is necessary. Visual inspection offers several advantages, including its simplicity, cost-effectiveness, and accessibility, as it requires minimal equipment and expertise.
However, it also has limitations, as it is limited to surface defects and relies heavily on the inspector’s experience and judgment, making it susceptible to subjective interpretation. Despite its limitations, visual inspection remains an essential tool in the bearing maintenance toolkit, providing valuable insights into the initial stages of bearing degradation and helping to prevent catastrophic failures through timely intervention.
Dimensional Measurement
Techniques involved
Dimensional measurement techniques play a crucial role in assessing the geometric accuracy and dimensional tolerances of bearings, ensuring compliance with specifications and identifying deviations indicative of potential issues. These techniques encompass a variety of methods, ranging from manual tools such as calipers and micrometers to advanced equipment like coordinate measuring machines (CMM). Calipers and micrometers are commonly used for quick and direct measurements of dimensions such as diameter, width, and thickness. In contrast, CMMs utilize sophisticated coordinate systems and precision probes to capture detailed dimensional data in three dimensions, enabling comprehensive assessment of bearing geometry. Additionally, CMMs offer capabilities for statistical analysis and geometric comparison, facilitating accurate evaluation of bearing quality and performance.
Advantages
Firstly, these methods provide precise and accurate measurements of dimensional tolerances, ensuring that bearings meet specified criteria for fit and function. This precision is essential for maintaining optimal performance and minimizing issues such as excessive clearance or interference within bearing assemblies. Additionally, dimensional measurement techniques enable quantitative data analysis, allowing for systematic comparison of measured dimensions against engineering standards or previous measurements. This analytical approach enhances the ability to identify trends, deviations, or anomalies that may indicate potential issues or variations in manufacturing processes. Overall, the advantages of dimensional measurement techniques include their ability to provide detailed, quantitative insights into bearing geometry, facilitating thorough assessment and quality control in bearing production and maintenance processes.
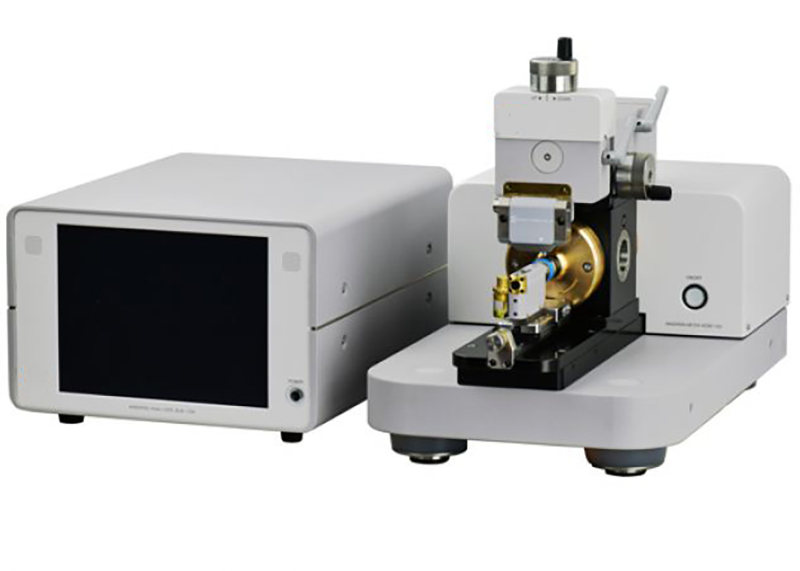
Limitations and Applicability to different bearing types and applications
While dimensional measurement techniques offer precise and quantitative assessment of bearing geometry, they are not without limitations. One significant limitation is the time-consuming nature of these methods, particularly when using advanced equipment like coordinate measuring machines (CMMs). Additionally, dimensional measurement techniques require specialized equipment and expertise, which may not be readily available in all settings. Furthermore, these methods may be less effective in detecting certain types of defects or anomalies that do not directly affect dimensional tolerances, such as surface imperfections or material degradation. However, dimensional measurement techniques are highly applicable to various bearing types and applications, including rolling element bearings, plain bearings, and thrust bearings. Their ability to provide accurate measurements of dimensions such as diameter, width, and thickness makes them valuable tools for ensuring proper fit, function, and quality control in diverse bearing assemblies and operating environments.
Non-Destructive Testing (NDT)
Overview of NDT methods
Non-destructive testing (NDT) methods represent a diverse range of techniques employed to assess the integrity of bearings without causing damage to the components. These methods utilize various physical principles to detect internal defects, anomalies, or irregularities that may compromise bearing performance or reliability. Common NDT methods include ultrasonic testing, eddy current testing, and magnetic particle inspection, each offering unique advantages and applications in bearing inspection. Ultrasonic testing involves the use of high-frequency sound waves to detect flaws or discontinuities within the material, while eddy current testing relies on electromagnetic induction to identify surface defects or variations in conductivity. Magnetic particle inspection detects surface and near-surface defects by applying a magnetic field and observing the interaction with magnetic particles.
Advantages and Limitations
Non-destructive testing (NDT) methods offer several advantages in the assessment of bearing integrity, making them valuable tools for detecting internal defects without causing damage to the components. One significant advantage of NDT is its ability to provide comprehensive evaluation of bearing integrity, including detection of flaws or anomalies that may not be visible to the naked eye or detectable through conventional inspection methods. Additionally, NDT techniques can be performed without the need for disassembly, allowing for inspection of bearings in situ, minimizing downtime and disruption to operations. Moreover, NDT methods offer high sensitivity and accuracy in defect detection, enabling early identification of potential issues before they escalate into costly failures. However, NDT also has limitations, including the requirement for specialized equipment and trained personnel, which may pose challenges in terms of cost and accessibility. Furthermore, certain NDT methods may be limited in their ability to detect certain types of defects or may require surface preparation for optimal results.
Suitable scenarios for NDT application
Non-destructive testing (NDT) methods find extensive application in various scenarios where the integrity and reliability of bearings need to be assessed without causing damage to the components. One suitable scenario for NDT application is in industries where critical equipment operates under demanding conditions, such as aerospace, automotive, and power generation. In these industries, bearings are subjected to high loads, extreme temperatures, and harsh environments, increasing the risk of premature failure. NDT techniques enable proactive monitoring and inspection of bearings, allowing for early detection of defects or anomalies that could compromise performance and safety. Additionally, NDT is particularly valuable in situations where disassembly of machinery for inspection is impractical or costly, such as in large-scale industrial installations or inaccessible locations.
Condition Monitoring Techniques
Definition and purpose and Types of condition monitoring methods
Condition monitoring techniques encompass a set of methodologies aimed at continuously assessing the health and performance of bearings and other machinery components. The primary purpose of condition monitoring is to detect abnormalities or deviations from normal operating conditions in real-time, enabling timely intervention to prevent catastrophic failures and minimize downtime. Various types of condition monitoring methods are employed, each offering unique insights into bearing health. Vibration analysis involves the measurement and analysis of vibration signatures generated by bearings during operation, allowing for the detection of imbalances, misalignments, or bearing defects. Thermography utilizes infrared imaging to monitor temperature variations in bearings, identifying overheating or lubrication issues that may indicate impending failure. Oil analysis involves the examination of lubricating oil samples to detect contaminants, wear particles, or chemical changes indicative of bearing degradation or lubrication breakdown.
Advantages and Limitations
One significant advantage is their ability to provide continuous, real-time monitoring of bearing conditions, allowing for early detection of abnormalities or deviations from normal operating parameters. This early detection enables timely intervention to address potential issues before they escalate into costly failures, minimizing downtime and optimizing equipment reliability. Additionally, condition monitoring techniques offer insights into the root causes of bearing degradation, facilitating targeted maintenance interventions to address underlying issues. However, condition monitoring also has limitations, including the need for specialized equipment and expertise, which may pose challenges in terms of cost and accessibility for some organizations. Furthermore, interpretation of condition monitoring data can be complex, requiring skilled analysis to differentiate between normal variations and indicative signals of impending failure.
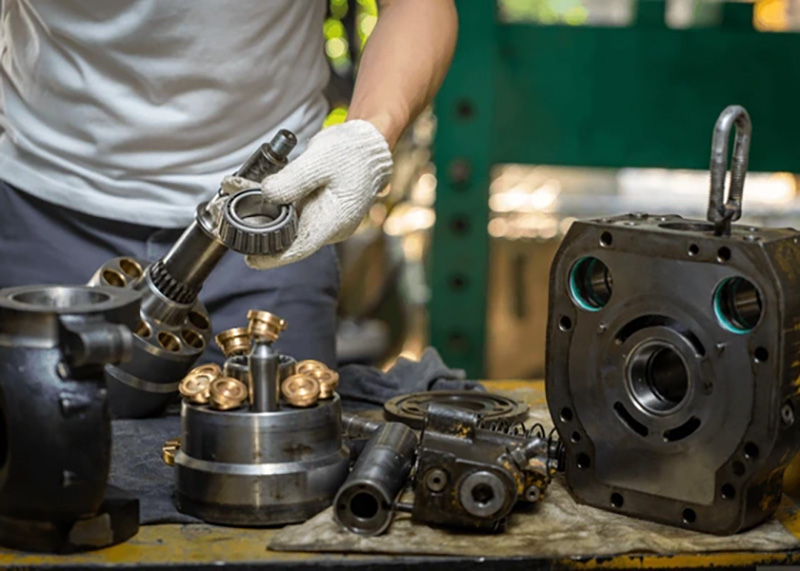
Application in different industrial sectors
In the aerospace industry, condition monitoring enables continuous assessment of aircraft components, including bearings in engines and landing gear, ensuring safety and reliability in flight operations. In the automotive sector, condition monitoring techniques are employed to monitor the health of bearings in engines, transmissions, and chassis components, optimizing vehicle performance and minimizing downtime. Additionally, in the manufacturing sector, condition monitoring facilitates predictive maintenance of machinery, including bearings in production lines and heavy equipment, improving productivity and reducing maintenance costs. Furthermore, in the energy sector, condition monitoring techniques play a vital role in ensuring the reliability of bearings in power generation facilities, such as turbines and generators, supporting uninterrupted electricity supply and operational efficiency.
Comparative Analysis of Methods
In the comparative analysis of methods for bearing inspection, several evaluation criteria guide the assessment process. These criteria include accuracy, which refers to the precision and reliability of the inspection method in detecting defects and deviations from normal operating conditions. Speed of inspection is another crucial factor, determining the efficiency and practicality of the method in a given operational context. Cost-effectiveness considers the overall expenses associated with implementing and maintaining the inspection technique, including equipment, training, and downtime costs. Detectability of defects assesses the method’s capability to identify various types of bearing anomalies, ranging from surface imperfections to internal defects. These criteria form the basis for constructing a comparison matrix, which systematically evaluates each inspection method against the defined criteria. The comparison matrix provides a comprehensive overview of the strengths and weaknesses of each method, facilitating informed decision-making in selecting the most appropriate approach for bearing inspection based on specific requirements and operational considerations.
Conclusion
In conclusion, bearing inspection is paramount for ensuring machinery reliability, safety, and efficiency. Various methods, including visual inspection, dimensional measurement, non-destructive testing, and condition monitoring, offer distinct advantages and applications. A comparative analysis based on accuracy, speed, cost-effectiveness, and detectability of defects enables informed decision-making in selecting the most suitable inspection method. While each method has its strengths and limitations, their combined application enhances proactive maintenance, minimizes downtime, and optimizes operational performance. By implementing a systematic approach to bearing inspection, industries can mitigate risks, extend machinery lifespan, and maximize resource utilization, ultimately contributing to overall productivity and cost savings.
References
- 1.”What to Look for When Inspecting Failed Bearings” from Shaft Grounding Rings;
- 2. “Bearing Inspection” from NSK Global;
- 3. “Inspection and monitoring” from SKF Bearings.
Related Posts
sensor bearings
Delrin Bearings: Lubrication-Free Long Life
Locomotive Bearing Specs That Matter Most
