Table of Contents
Categories
Mastering Bearings: Installation & Removal Hacks
Introduction
In the mechanical realm, bearings play a crucial role in facilitating smooth rotation and minimizing friction. This comprehensive guide delves into the intricacies of bearing handling, covering diverse types, installation, removal, and troubleshooting. Proper handling is paramount for the longevity and efficiency of bearings, as inadequate procedures can lead to premature failure, causing downtime and costly repairs. Whether a seasoned professional or a do-it-yourself enthusiast, possessing a comprehensive knowledge of correct installation and removal techniques is imperative for ensuring optimal performance, safety, and longevity in mechanical systems.
Preparing for Installation
Gathering Necessary Tools and Equipment
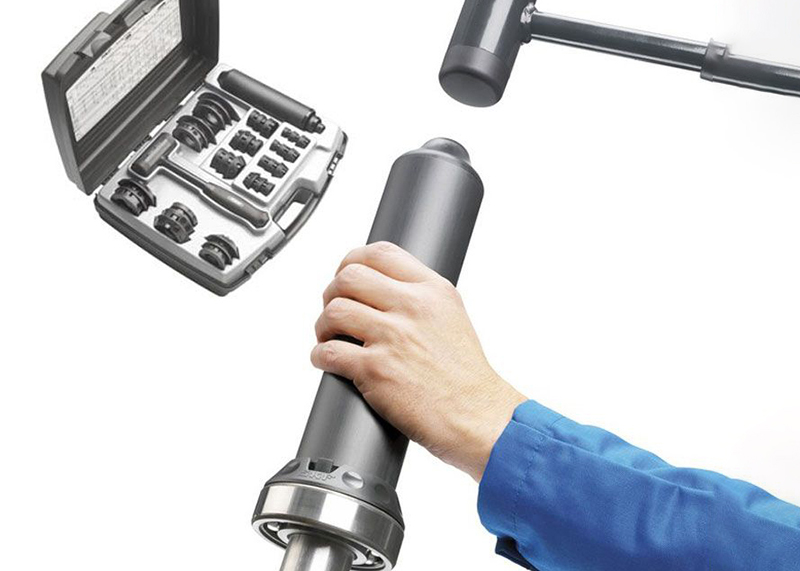
Before proceeding with bearing installation, it’s essential to gather the necessary tools and equipment to ensure a smooth and successful process. The specific tools required may vary depending on the type and size of the bearing, as well as the equipment involved. However, here is a general list of tools commonly used for bearing installation:
- Bearing Heater: For heating bearings, facilitating easier installation.
- Mounting Tools: Such as bearing fitting tools or press tools to apply force evenly during installation.
- Hydraulic or Mechanical Press: Useful for pressing bearings into place, especially in tight fits.
- Driver and Hammer Set: For gently tapping bearings into position.
- Alignment Tools: Ensures proper alignment during installation, preventing misalignment issues.
- Torque Wrench: To tighten fasteners to the manufacturer’s specifications.
- Lubricants and Grease: For lubricating the bearing and reducing friction during installation.
- Clean Rags and Cleaning Solvent: To clean the mounting surfaces and remove any contaminants.
- Measuring Tools: Such as calipers or micrometers for accurate measurements.
- Safety Equipment: Including gloves and safety glasses to protect against potential hazards.
Always refer to the manufacturer’s guidelines and specifications for the specific bearing and machinery you are working with, as they may provide additional recommendations or requirements. Additionally, it’s crucial to follow proper safety procedures and guidelines during the installation process.
Inspecting Bearings for Damage
Before installing a bearing, carefully inspect it for damage. Check for visible issues like scratches or discoloration, assess runout with a dial indicator, and rotate the bearing by hand to feel for any roughness. Measure dimensions, look for deformation, and pay attention to unusual noise or vibration. Examine seals or shields for damage and refer to the manufacturer’s guidelines for specific inspection details. If you spot any problems, don’t proceed with installation. Damaged bearings can lead to early failure and impact machinery performance. In such cases, replace the damaged bearing following the manufacturer’s handling and installation recommendations.
Preparing the Work Area
Before installing bearings, prepare the work area by ensuring it is clean, well-lit, and free of debris. Arrange all necessary tools and equipment within easy reach. Have a clean workspace to prevent contamination, and consider using protective covers on nearby equipment to avoid accidental damage. Review the installation environment for proper ventilation and safety measures. Additionally, check that all required components and documentation are readily available. This preparation contributes to a smooth and efficient bearing installation process while minimizing the risk of errors or damage.
Bearing Installation
Step-by-Step Guide for Proper Installation
- Prepare the Shaft and Housing: Clean and inspect the shaft and housing where the bearing will be installed. Remove any burrs or contaminants that could affect the fit.
- Apply Lubrication: Apply the appropriate lubricant or grease to the bearing and the mating surfaces on the shaft and housing. This helps reduce friction during installation.
- Use the Correct Mounting Method: Depending on the bearing type, use the appropriate mounting method. This may involve using a press, mounting tools, or other suitable techniques.
- Apply Even Force: Ensure that force is applied evenly during installation to prevent misalignment or damage to the bearing. Consider using a hydraulic or mechanical press for controlled force.
- Check for Proper Fit: Confirm that the bearing is securely and evenly seated on the shaft or in the housing. Use measuring tools to verify dimensions and alignment.
- Secure Fasteners: If applicable, secure any fasteners or locking devices according to the manufacturer’s specifications. Use a torque wrench to achieve the recommended torque.
- Verify Alignment: Check the alignment of the shaft and housing to ensure they are in the correct position. Misalignment can lead to premature bearing failure.
Common Mistakes to Avoid during Installation
Inadequate Inspection: Skipping or neglecting a thorough inspection of the bearing before installation can lead to the oversight of potential damage or defects. This oversight may result in premature failure and performance issues in the machinery.
Improper Lubrication: Failing to apply the appropriate lubrication or using the wrong type can lead to increased friction, heat generation, and accelerated wear of the bearing. It’s essential to follow the manufacturer’s recommendations for lubrication during the installation process.
Misalignment during Installation: Applying uneven force or misaligning the bearing during installation can result in poor performance, increased friction, and premature failure. It is crucial to use proper mounting techniques and ensure that force is applied evenly to prevent misalignment.
Incorrect Tightening of Fasteners: Over-tightening or under-tightening fasteners, such as nuts and bolts, can have detrimental effects on the bearing’s performance. Over-tightening may lead to increased friction and deformation, while under-tightening can result in insufficient preload and potential loosening during operation. Always follow the manufacturer’s torque specifications for fastener tightening.
Avoiding these common mistakes during bearing installation is crucial for ensuring the longevity, reliability, and optimal performance of the bearing within the mechanical system. Always refer to the manufacturer’s guidelines and specifications to adhere to proper installation procedures.
Tools and Techniques for Bearing Removal
Overview of Bearing Removal Methods
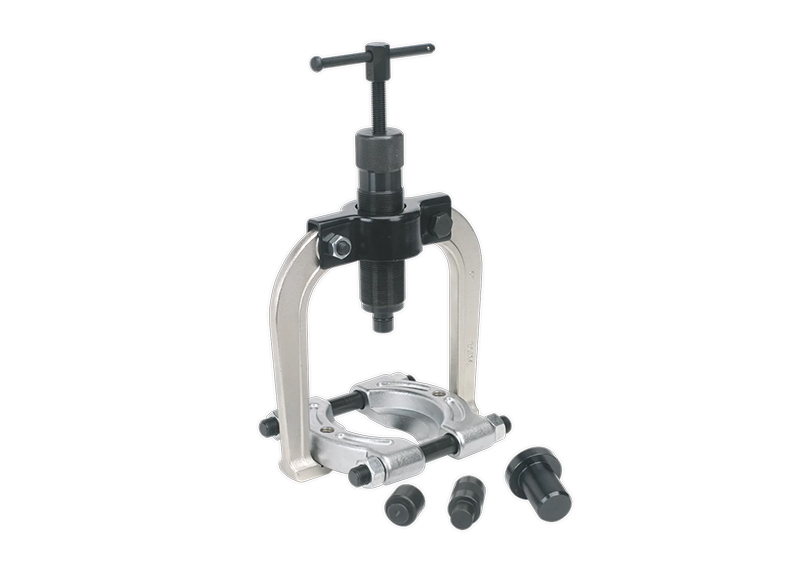
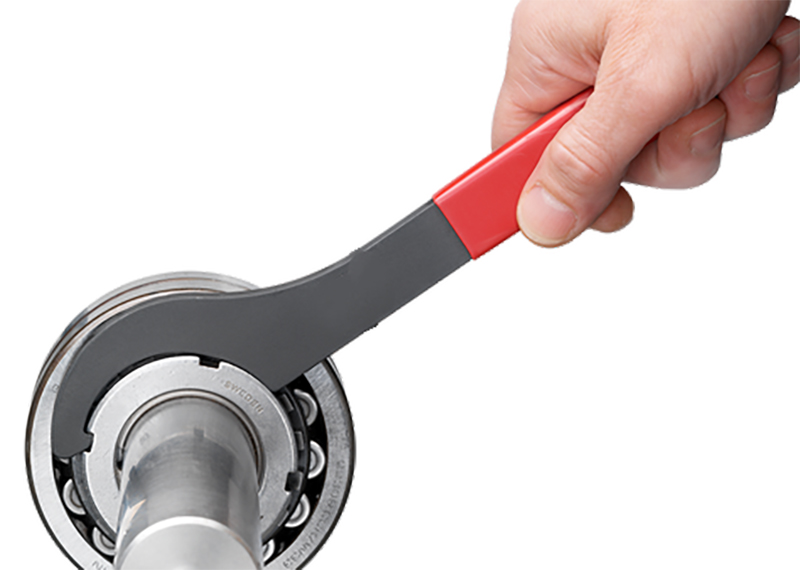
Mechanical Pullers: Mechanical pullers are widely used for disassembling bearings. They come in various designs, featuring arms or jaws that grip the bearing’s outer ring. By applying force, these pullers safely and gradually dislodge the bearing from its housing or shaft.
Hydraulic Pullers: Hydraulic pullers utilize hydraulic force to disassemble bearings. These tools offer controlled and powerful extraction, making them effective for handling large bearings or those with tight interference fits.
Bearing Splitters: Bearing splitters are tools that work by creating a split in the bearing’s outer ring. This allows for easy removal without applying excessive force. Bearing splitters are particularly useful in tight spaces or when other methods may be challenging.
Inner Ring Pullers: Inner ring pullers are designed specifically for removing the inner ring of a bearing. These tools grip the inner race, providing a controlled disassembly process without damaging the surrounding components.
Induction Heating: Induction heating is not only used for bearing removal but also for disassembly. By heating the outer ring of the bearing, the metal expands, breaking the interference fit and facilitating the safe disassembly of the bearing from its seat.
These disassembly methods are commonly employed in maintenance and repair processes, and the choice of method depends on factors such as the type and size of the bearing, the location of the bearing on the equipment, and the available tools and equipment. It is crucial to follow proper procedures and guidelines to ensure a safe and effective bearing disassembly process without causing damage to the bearing or surrounding components.
Safety Measures during Bearing Removal
During bearing disassembly, prioritizing safety measures is paramount to prevent injuries and equipment damage. Essential precautions include wearing appropriate personal protective equipment (PPE), ensuring proper training for using disassembly tools, and understanding the potential hazards associated with bearing removal. Rigorous adherence to manufacturer guidelines and safety protocols, as well as meticulous inspection of tools and equipment, is crucial. Additionally, providing a well-ventilated workspace and following correct procedures minimizes the risk of accidents. Prioritizing safety not only protects personnel but also preserves the integrity of the equipment and surrounding components during the disassembly process.
Troubleshooting Common Issues
Stuck or Stubborn Bearings
When faced with stuck or stubborn bearings during disassembly, it’s crucial to approach the situation with care and patience. Begin by assessing the potential causes of the resistance, such as corrosion, improper fitting, or accumulated debris. Applying penetrating lubricants can help loosen the components. Alternating between heating and cooling methods, like induction heating or using dry ice, can assist in breaking the interference fit. Utilizing mechanical or hydraulic pullers with controlled force can aid in gradually dislodging the bearing. In extreme cases, employing impact or shock methods may be considered. It’s essential to avoid excessive force, as this may damage the bearing or surrounding components. Regularly reassessing the situation and adjusting the approach ensures a safe and effective disassembly process for stubborn bearings.
Dealing with Corroded Bearings
When confronted with corroded bearings during disassembly, a careful and systematic approach is crucial. Begin by applying a penetrating oil to the corroded areas, allowing it time to penetrate and break down rust or corrosion. Gentle tapping with a mallet or hammer can help dislodge the bearing without causing damage. If the corrosion is severe, consider using heat through induction or localized heating to expand the metal, facilitating easier removal. Combining these methods and allowing time for the penetrating oil to work effectively enhances the chances of successful disassembly. Patience is key, as forcing the removal of heavily corroded bearings may lead to damage. Prioritizing a gradual and measured approach helps preserve the integrity of both the bearing and the surrounding components.
Addressing Inner and Outer Ring Separation
When facing the challenge of the inner and outer ring separating during bearing disassembly, a strategic approach is crucial to avoid damage. Begin by assessing the type of interference fit and the potential causes of the separation. If the interference fit is due to rust or corrosion, applying a penetrating oil can help alleviate the bond. Alternatively, employing heat to selectively expand the outer ring can aid in breaking the fit. Utilizing a combination of mechanical or hydraulic pullers, specifically designed for disassembly, can provide controlled force to separate the rings without causing damage. Ensuring proper alignment and evenly distributing force during the disassembly process is vital. By approaching the problem systematically and employing suitable tools and techniques, one can overcome the challenge of inner and outer ring separation while preserving the integrity of the bearing.
Conclusion
In conclusion, mastering the art of bearing handling is essential for ensuring the longevity, efficiency, and safety of mechanical systems. Proper installation, meticulous inspection, and adherence to manufacturer guidelines are paramount in preventing premature failure and costly repairs. The comprehensive guide covers the preparation for installation, step-by-step installation procedures, common mistakes to avoid, and tools and techniques for bearing removal. Emphasis is placed on safety measures during both installation and removal processes. Troubleshooting techniques for stubborn or corroded bearings, as well as inner and outer ring separation, provide valuable insights for overcoming challenges. By incorporating these practices, professionals and enthusiasts alike can contribute to the optimal performance and reliability of bearings in diverse mechanical applications.
References
1.”Bearing Installation and Removal: Here Are the Basics” from MROSUPPLY;
2. “Bearing installation and removal basics” from Processing;
3. “Mechanical tools for mounting and dismounting” from SKF.
Related Posts
sensor bearings
Delrin Bearings: Lubrication-Free Long Life
Locomotive Bearing Specs That Matter Most
